Download Your Free Guide Now

Starting a business requires a ton of leg work up front. A pre-launch marketing plan not only puts the pieces in place for your future marketing, but it also helps create buzz around your venture long before your doors are even open. Many businesses owners don't get into business with the goal of becoming marketers, so it can be difficult to know where to start.
Step 1: Create Your Website
When: 90 Days Before Launch
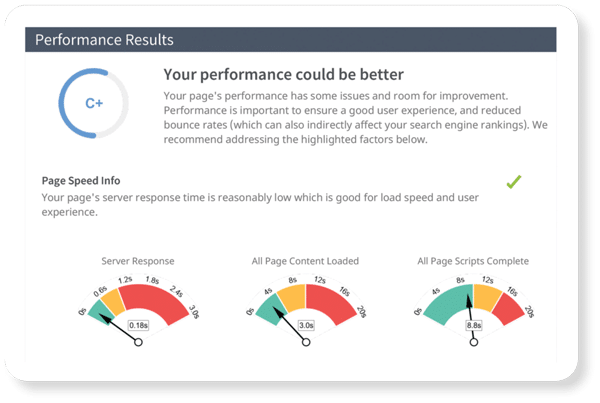
Your website is the digital equivalent of your business card. Clients, customers, and search engines expect you to have a website that loads quickly, explains what you do and what sets you apart, and puts your visitors in contact with you. All of your other digital marketing strategies will direct users to your website, so setting this up first, well in advance of your launch date, is a must.
The specifics of what your website will need will largely depend on the business you’re launching, but there are some basic standards you’ll want to make sure your website meets.
Website Checklist:
Technical Elements
- Secure, reliable hosting
- Updated security certificates
- Fast page loading times
- Meets ADA accessibility standards
Design and Content
- Responsive design that works and displays correctly across all devices and platforms
- Good user experience so users can find the information they’re looking for
- Information about services you provide and what makes you different
- Updated content that’s refreshed regularly
Step 2: Set Up Your Social Accounts
When: 90 Days Before Launch
Creating social media profiles well in advance of your launch gives you the chance to begin building your brand and your relationship with your customers before you open your doors (digital or otherwise). Dialing in a social media strategy requires a lot of testing and trial and error. Using the time before your launch to build your audience and then figure out what resonates with that audience means a better social presence (and larger audience) once you actually launch.
Here are some types of content that can help you build your audience:
- Contests and giveaways. A fun way to grow your social audience is through contests or giveaways. These can be in the form of a coupon, free product, or a free consultation.
- Tagging. There are a few clever ways to utilize tagging in social posts (even if it’s just captioning a photo with “tag a friend that needs to hear this”), but the more you can encourage people to tag their friends, the more your page will be put in front of them.
Here are some types of content to experiment with:
- Questions. Asking your audience to weigh in is a good way to increase engagement and get customer feedback.
- Behind the scenes. For a business that hasn’t launched, a peek behind the scenes of your operation is a great way to showcase what your product or service will be like after you launch.
- Videos. Most social platforms love videos, the shorter the better.
- Product photos. If you’re selling a product, showcasing it well before launch means your customers will be familiar with it ahead of time.
- Stories. Why did you get into business? Who are you? Showcase your brand in the form of stories.
- Testimonials. Those testimonials you collected fit perfectly on social media before launch. Post what people are saying about your business or product before you launch (with permission, of course).
- Before and after. These are a great way to demonstrate what your product or service actually does for customers. Make sure to get permission before sharing a story.
Step 3: Optimize Your Local SEO
When: 60 Days Before Launch
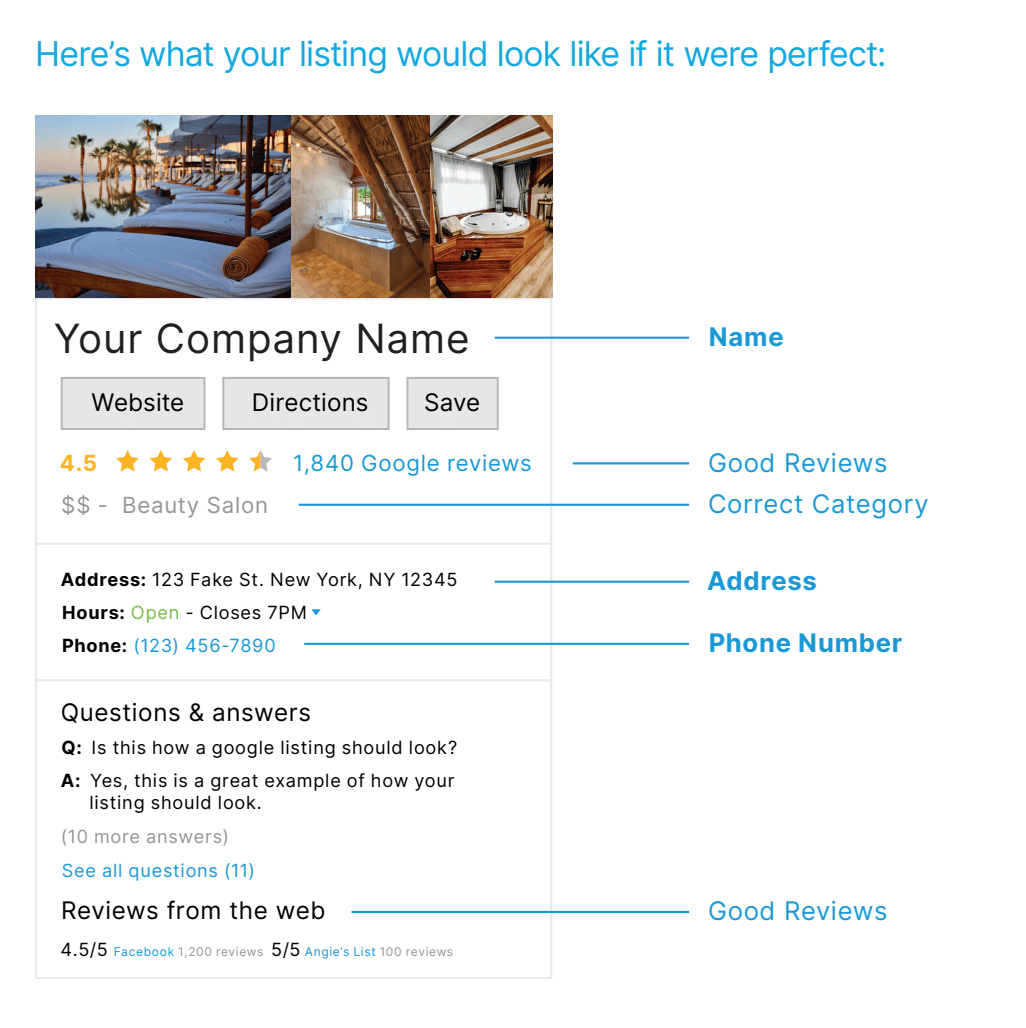
Now that you’ve set up your website, it’s time to dial in your local SEO. Start with creating your business listings on Google My Business and Apple Maps. You can enter all of your information as you would a normal listing, but make sure to select and add your “future opening date.” Take the time to fill out all of your information correctly, because inaccurate listings cause people to lose trust in your business, and ultimately send them to your competitors.
Once you’ve set these profiles up, the next step is to create profiles on local directories. The exact directories that will be the most valuable for your business will largely depend on what you do. Research the most common directories for your industry, your area, and your size of business. Keeping these listings updated requires more work than you might realize, so it’s worth it to keep track of which listings you’re creating profiles for, and audit them frequently.
Why is all of this necessary? Why should you do this after setting up your website? Because these listings aren’t just based on the information you enter. Search engines crawl everything from your website itself to the listings you create in external directories to compile your local listings. They also allow users to make suggestions to listings. That means things change frequently. Auditing your listings frequently helps make sure inaccurate information is corrected quickly. If you don’t have the time to spend keeping these listings updated, consider outsourcing this activity to a product or another professional.
Step 4: Set Up Your Review Framework
When: 30 Days Before Launch
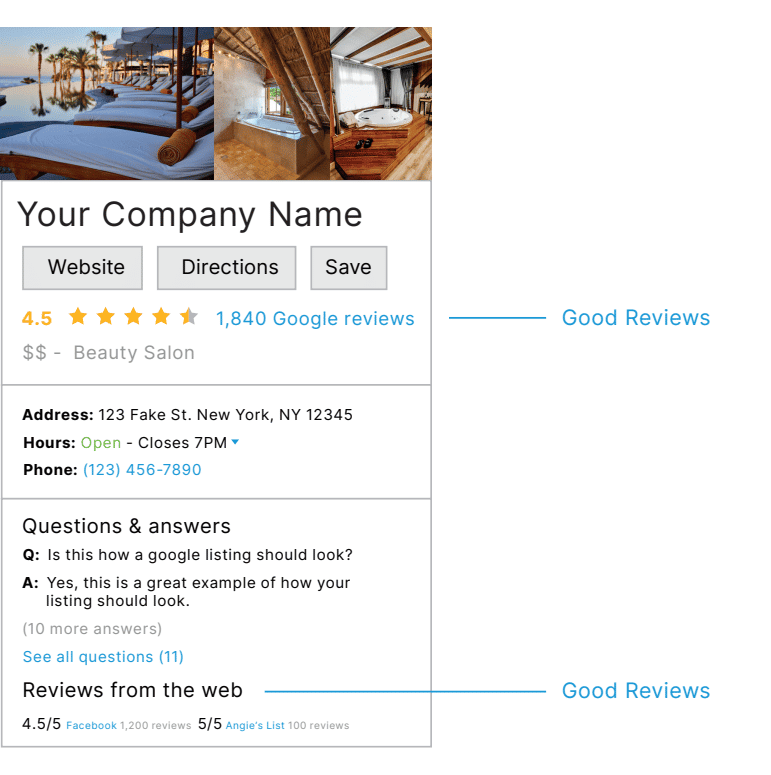
It might seem odd at first, but reviews and local SEO go hand in hand. Your prospective customers aren’t just looking at your reviews to get a sense of what people think of your services. They’re also looking at your negative reviews to see how you respond to them. And it's not just customers who are paying attention – search engines index reviews too.
There are three important factors that make or break reviews:
- The number of reviews. More is generally better.
- The overall sentiment of the reviews. Overwhelmingly negative reviews aren’t good, but overwhelmingly positive reviews tend to not look as real.
- Responses to negative reviews. Negative reviews offer you a chance to show prospective customers how you respond to complaints.
It’s important to note that if you’ve selected a “future opening” date on your Google My Business profile, any reviews collected before then won’t be added to your listing. Spend the last 30 days before your launch setting up a system to automatically request a review from the customers that do business with you, and come up with a plan to address the negative reviews in a way that is professional and considerate while still being mindful of any laws that might impact your industry (like HIPAA if you’re in the medical profession).
Let's take another look at that "perfect" listing, specifically the two sections where reviews are listed.
Contact us for a free demo.
If you’re ready to speak with a knowledgeable marketing professional, we are pleased to offer a free online demo and consultation.


